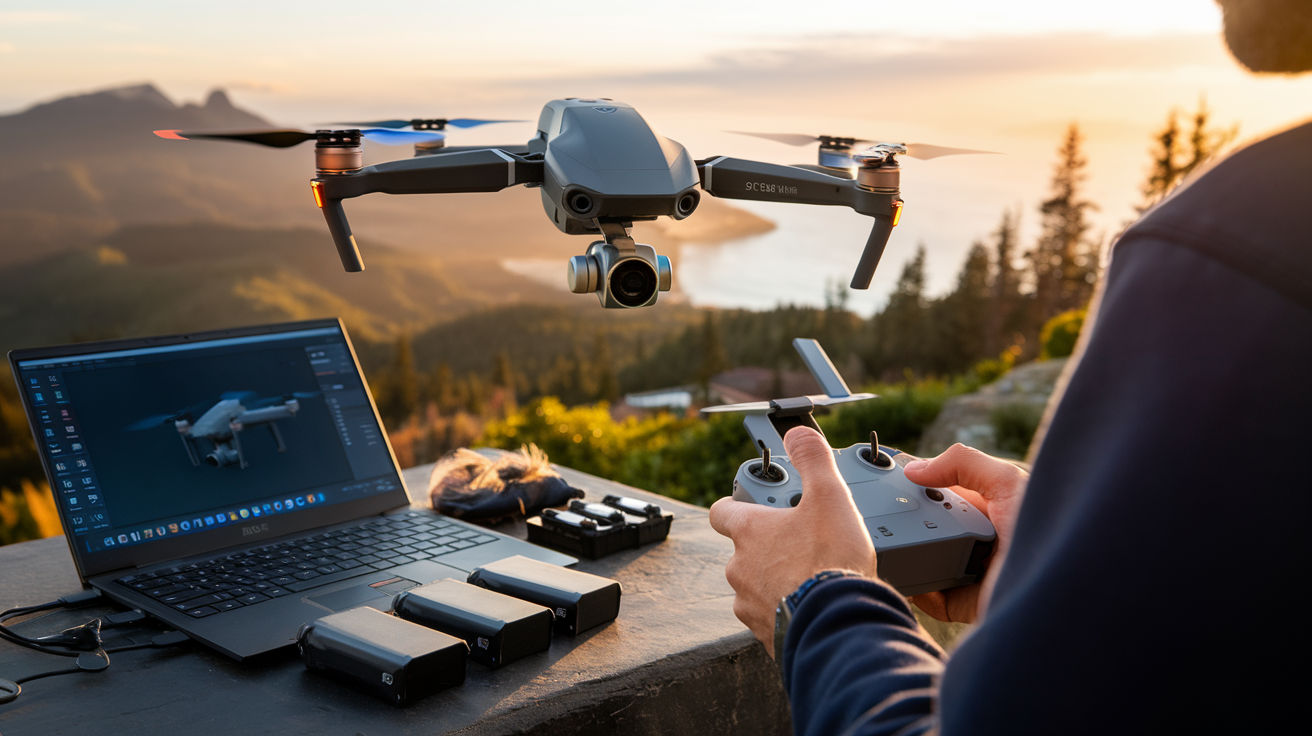

Drones have revolutionized the world of filmmaking, allowing creators of all skill levels to capture stunning cinematic shots that were once possible only with expensive equipment. However, achieving truly professional-looking footage isn’t just about owning a drone; it’s about mastering its capabilities. One of the most critical aspects of drone operation is understanding and effectively using its various flight modes.
Drone flight modes are designed to help pilots control their drones with precision and creativity, offering unique tools to execute everything from smooth pans to complex tracking shots. In this post, we’ll explore how to use these flight modes to create cinematic shots that elevate your videos, blending technical know-how with artistic intent. Whether you’re new to drones or looking to sharpen your skills, this guide will provide actionable tips and insights to help you capture breathtaking footage.
1. Understanding Drone Flight Modes
What are Drone Flight Modes?
Drone flight modes are pre-programmed settings that influence how a drone responds to user input, making it easier to execute specific types of movements or maintain stability in various conditions. These modes are designed to cater to both beginner and professional pilots, providing options for manual control and automated assistance. For instance, manual modes give you full control over the drone’s movements, perfect for creating dynamic and customized cinematic shots. On the other hand, automated flight modes like ActiveTrack and Orbit are excellent for achieving consistent and precise movements with minimal effort.
Key Benefits of Flight Modes for Cinematic Shots
Understanding and utilizing drone flight modes can significantly enhance the quality of your footage. First, they enable smoother and more stable movements, critical for achieving a professional, cinematic look. Whether you’re performing a slow pan across a dramatic landscape or tracking a moving subject, the right flight mode ensures precision and consistency.
Additionally, many drones offer intelligent flight modes tailored for specific shots, such as following a subject or flying a pre-determined path. These modes not only make complex shots more accessible but also free up your focus to concentrate on framing and creativity. By mastering these tools, even beginner pilots can capture footage that rivals professional drone videography.
3. Leveraging Automated Flight Modes for Dynamic Shots
What Are the Best Automated Flight Modes for Cinematic Shots?
Automated flight modes are a game-changer for creating dynamic and professional-looking drone footage, even if you’re new to piloting. Popular modes such as ActiveTrack, Orbit, Waypoints, and Dronie allow you to execute complex maneuvers with minimal manual effort. For instance, ActiveTrack is ideal for following a subject while maintaining smooth framing, while Orbit lets your drone circle around a target to create a cinematic parallax effect.
These modes are particularly useful for beginners or solo operators who need assistance with multitasking. For example, instead of simultaneously controlling the drone’s movement and camera angle, you can rely on these modes to focus on perfecting the shot composition.
How Do You Use Automated Modes Without Losing Creative Control?
One common concern is that relying on automated flight modes might limit creativity or lead to footage that feels generic. However, many drones allow you to customize settings within these modes to add a personal touch. For example:
- Adjust Speed and Altitude: Tailor the drone’s movement to match the mood of your shot. A slower speed adds drama, while a higher altitude offers a grander perspective.
- Set Waypoints Thoughtfully: When using Waypoints mode, plan your route to highlight key elements of the scene, such as leading lines in a landscape or transitions between focal points.
- Combine Modes and Manual Adjustments: Use an automated mode like Orbit to create the base movement, then switch to manual controls to refine framing or timing for a more customized result.
These small tweaks ensure your footage feels unique and aligns with your creative vision.
What Are the Limitations of Automated Flight Modes?
While automated modes are highly versatile, they aren’t without limitations. For example:
- Limited Adaptability: Automated modes may struggle in environments with obstacles, unpredictable movement, or changing lighting conditions. In these cases, manual intervention is often necessary to avoid collisions or poor framing.
- Pre-Defined Movements: Some modes, such as Dronie or Rocket, follow fixed patterns that might not suit every creative scenario.
- Battery and GPS Dependency: Many automated modes require strong GPS signals and sufficient battery life to complete their functions. Always check these before launching.
Understanding these limitations helps you decide when to rely on automation and when to switch to manual control for better results.
How to Practice and Perfect Automated Modes
To build confidence in using automated flight modes, start by practicing in open, obstacle-free environments. Experiment with different modes and settings to understand their capabilities and quirks. For example:
- Use Orbit mode around a stationary object like a tree or sculpture to practice achieving smooth, consistent motion.
- Try ActiveTrack on slow-moving subjects like a walking friend or pet before advancing to faster-moving objects like cyclists or vehicles.
Gradually introduce complexity by incorporating manual adjustments or flying in tighter spaces. With consistent practice, you’ll learn how to leverage these tools for creative and dynamic shots while maintaining control and artistic intent.
By balancing the strengths of automated flight modes with your own creativity, you can take your drone footage to the next level, producing cinematic shots that are both polished and unique.
4. Combining Flight Modes for Complex Cinematic Sequences
How to Transition Between Flight Modes Mid-Flight
Combining manual and automated flight modes allows for more dynamic and intricate cinematic sequences. Many professional drone pilots use this approach to craft seamless transitions and unique perspectives. For example, you might start with an Orbit mode to establish a setting, then switch to manual controls for a dramatic reveal shot.
To execute this effectively:
- Plan Your Sequence: Before takeoff, decide how each flight mode contributes to your shot.
- Practice Smooth Transitions: Familiarize yourself with your drone’s controls so you can switch modes mid-flight without abrupt changes in movement.
- Use Pauses Strategically: Take advantage of moments when the drone is stationary or moving slowly to switch modes without disrupting the scene.
Advanced Techniques for Combining Modes
One of the most effective combinations is using Waypoints mode for pre-planned movements, followed by manual flight for improvisational touches. For example, you could set a series of waypoints to guide the drone through a canyon, then take over manually to focus on capturing a dramatic subject like a bird of prey mid-flight.
Another advanced technique is layering automation with camera movement. For instance:
- Use ActiveTrack to follow a subject, but manually adjust the gimbal tilt and zoom for a more dynamic feel.
- Combine Orbit with subtle gimbal adjustments to add depth and variety to the shot.
Practical Scenarios
Here are a few real-world examples of combining modes:
- Event Coverage: Start with a Dronie to showcase the event’s scale, then use manual flight to focus on key highlights like performers or speakers.
- Travel Vlogs: Use Waypoints to capture scenic locations in a smooth sequence, then switch to manual for close-ups of landmarks or people.
- Action Shots: Track a moving subject with ActiveTrack, but switch to manual for tighter angles or to capture unexpected movements.
Mastering these combinations enables you to create engaging sequences that stand out, blending the precision of automation with the creativity of manual control.
5. Tips for Optimizing Drone Settings for Cinematic Quality
Fine-Tuning Camera Settings
To achieve cinematic drone shots, your drone’s camera settings play a critical role. Key adjustments include:
- Resolution and Frame Rate: Shoot in 4K for high-quality footage, and use a frame rate of 24fps for a classic cinematic feel or 60fps for smooth slow-motion.
- Shutter Speed: Follow the 180-degree shutter rule by setting your shutter speed to double your frame rate (e.g., 1/50 for 24fps). This ensures natural motion blur.
- ISO and White Balance: Use low ISO settings (e.g., 100) to minimize noise and set the white balance manually to prevent color shifts in changing light conditions.
Using ND Filters for Smooth Footage
Neutral density (ND) filters are essential for maintaining proper exposure, especially in bright outdoor conditions. They reduce the amount of light entering the camera, allowing you to keep the shutter speed low for natural motion blur. This is particularly important when shooting during midday or in reflective environments like beaches or snowy landscapes.
Here’s how to choose the right ND filter:
- ND4-8: Ideal for early morning or late afternoon shoots.
- ND16-32: Perfect for midday sun and bright conditions.
- ND64 and Polarizing Filters: Use these for extreme brightness or to reduce glare from water and glass.
Stabilization and Post-Processing
Even with advanced flight modes and settings, stabilization can make or break cinematic quality. Most drones have built-in gimbals, but additional steps can ensure smooth footage:
- Enable EIS (Electronic Image Stabilization) if available on your drone.
- Post-Process for Polishing: Use software like Adobe Premiere Pro or DaVinci Resolve to stabilize footage, enhance colors, and correct exposure for a cinematic look.
Test, Practice, and Refine
No two environments are the same, so test your settings and flight modes before the actual shoot. Practice flying in diverse conditions—urban, rural, windy, and calm—to build confidence and versatility. Keep a checklist to ensure you’re prepared, including checking battery levels, GPS signal strength, and weather forecasts.
Putting It All Together
By optimizing your drone’s camera settings, leveraging ND filters, and combining flight modes, you’ll be equipped to capture footage that’s not just cinematic but uniquely yours. These final touches can elevate your drone videography from good to exceptional, helping your shots stand out in competitive fields like travel vlogging, event coverage, or cinematic storytelling.
Conclusion
Mastering drone flight modes is the key to unlocking the full potential of your drone and creating cinematic shots that captivate viewers. By understanding the various flight modes—manual and automated—you can achieve smooth, dynamic, and professional-looking footage. Manual flight offers unparalleled control for complex movements, while automated modes like ActiveTrack and Orbit make challenging shots more accessible. Combining these approaches, along with fine-tuning your drone’s camera settings and practicing in different environments, ensures your footage is both polished and unique.
Remember, cinematic quality comes not just from the tools but from how you use them creatively. Experiment with different modes, settings, and techniques to find your style, and don’t be afraid to push your drone’s capabilities.
Now it’s your turn! Take your drone out for a spin and try the tips shared in this guide. Practice combining flight modes, test your camera settings, and create stunning sequences. Share your results with the community and inspire others with your cinematic vision. Happy flying!


