Drone photography has revolutionized the way we capture the world, offering breathtaking perspectives and creative opportunities that were once out of reach. However, as accessible as drones have become, mastering drone photography requires more than just owning a good drone. Avoiding common mistakes is essential to producing stunning images and ensuring a safe and enjoyable flying experience.
In this guide, we’ll explore the 5 most common drone photography mistakes that many beginners and even experienced pilots make. More importantly, we’ll provide practical tips to help you avoid these pitfalls, so you can elevate your skills and create captivating aerial shots every time you fly.
1. Ignoring Local Drone Regulations
One of the most common drone photography mistakes is overlooking or misunderstanding local drone regulations. Flying without proper knowledge of the rules not only puts you at risk of fines and legal trouble but can also endanger others in the area. Every region has unique laws governing drone use, such as restricted airspaces, maximum altitude limits, and permissions required for specific zones.
For example, flying near airports or over crowded public spaces is often prohibited without special clearance. Failing to follow these rules can lead to confiscation of your drone, hefty penalties, or even criminal charges in severe cases. Beyond legal compliance, adhering to regulations ensures safer skies for everyone.
How to Avoid This Mistake
- Research Local Laws: Before flying, familiarize yourself with the drone regulations in your area or the location you plan to visit. Websites like the Federal Aviation Administration (FAA) in the U.S. or local aviation authorities are great starting points.
- Use Apps and Tools: Apps like B4UFLY or AirMap can help you check no-fly zones, restricted airspace, and temporary restrictions in real time.
- Register Your Drone: In many countries, drones over a certain weight require registration. Ensure your drone is properly documented if required.
- Respect Privacy: Avoid flying over private property or capturing images without consent to stay clear of potential legal and ethical issues.
By taking the time to understand and follow drone regulations, you’ll not only protect yourself legally but also build trust within the drone community and ensure a safer flying experience.
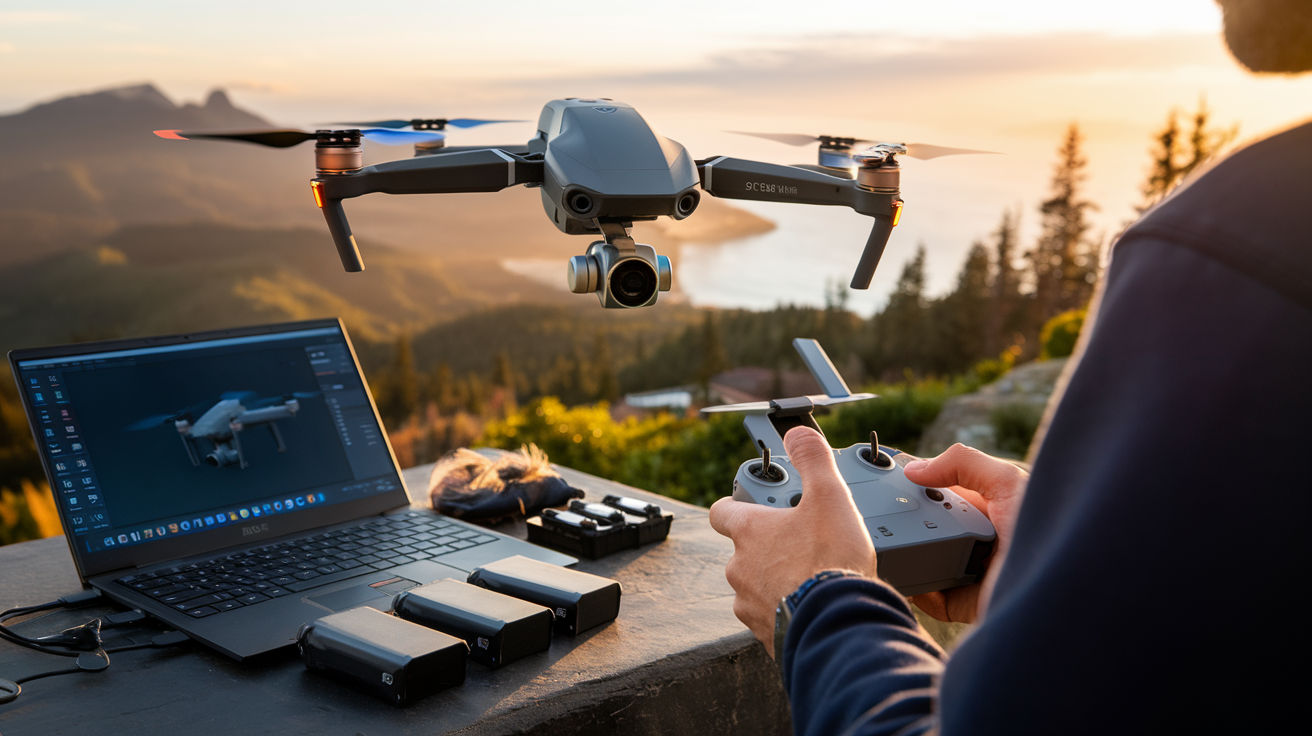
2. Poor Pre-Flight Planning
A lack of pre-flight preparation is another frequent mistake that can result in missed opportunities and technical failures. Studies show that nearly 70% of drone crashes are caused by preventable errors, such as depleted batteries, poor weather conditions, or malfunctioning equipment. Without proper planning, even the most advanced drone won’t guarantee high-quality shots.
Pre-flight planning isn’t just about checking the weather—it also involves ensuring your drone and accessories are ready to perform. Forgetting essential items like memory cards, charged batteries, or spare propellers can cut your flight session short. Additionally, failing to scout the location beforehand may leave you unprepared for obstacles, lighting conditions, or legal restrictions.
How to Avoid This Mistake
- Create a Pre-Flight Checklist: Include essentials such as charging batteries, packing spare parts, updating firmware, and ensuring your camera settings are optimized. This reduces the chance of missing critical items.
- Scout the Location: Visit the area ahead of time or use tools like Google Earth to identify potential obstacles, vantage points, and lighting conditions.
- Check the Weather: Strong winds and rain can quickly make drone operation unsafe. Apps like Windy or UAV Forecast provide real-time updates on weather and wind speed.
- Test Your Equipment: Before heading out, perform a test flight to ensure your drone is functioning correctly. Verify that the GPS signal is strong and sensors are responsive.
By taking these steps, you’ll minimize technical issues and maximize your ability to focus on capturing stunning aerial shots. A little preparation goes a long way in ensuring a smooth and successful drone photography session.
3. Using the Wrong Camera Settings
Even with a top-of-the-line drone, using incorrect camera settings can ruin your photos. A common question among drone photographers is, “Why do my images look overexposed, blurry, or washed out?” The answer often lies in default settings or an unfamiliarity with manual controls. Unlike ground-level photography, shooting from the sky presents unique lighting challenges that require precision and adaptability.
Common Camera Setting Mistakes
- Relying on Auto Mode: While auto mode may be convenient, it often struggles to adapt to changing light conditions, resulting in poor exposure or lack of detail.
- Ignoring RAW Format: JPEG files are quick to process but offer limited flexibility in post-production. Shooting in RAW provides greater control over editing.
- Improper White Balance: Failing to adjust white balance can lead to unnatural color tones, especially during sunrise or sunset when lighting changes rapidly.
How to Avoid This Mistake
- Master Manual Controls: Learn to adjust ISO, shutter speed, and aperture based on your environment. For example, lower ISO settings reduce noise in bright conditions, while faster shutter speeds prevent motion blur.
- Shoot in RAW: Most drones support RAW image formats, which preserve more data for post-editing. This is especially helpful for recovering details in highlights and shadows.
- Adjust White Balance Manually: Use a custom white balance setting to match the lighting conditions. For instance, select “Daylight” for sunny environments or “Cloudy” for overcast skies.
- Use Exposure Bracketing: This technique involves taking multiple shots at different exposures, ensuring you capture the best details in both bright and dark areas.
Addressing Common Concerns
- “What settings should I use for moving objects?”
Use a fast shutter speed (e.g., 1/1000 or higher) to freeze motion and prevent blur. - “How can I deal with harsh sunlight?”
Use neutral density (ND) filters to reduce light entering the camera, allowing you to maintain optimal settings without overexposure. - “Why do my photos look dull?”
Consider increasing contrast and saturation slightly in post-editing or shooting during golden hour for more vibrant, dynamic lighting.
By taking the time to understand and adjust your drone’s camera settings, you’ll significantly improve the quality of your aerial photography. This not only helps avoid common pitfalls but also enables you to capture more professional and visually compelling images.
4. Overlooking Composition and Perspective
Composition is the backbone of any great photograph, yet many drone photographers fall into the trap of focusing solely on altitude or wide-angle views. A question often asked is, “How can I make my drone shots stand out?” The answer lies in thoughtful composition and experimenting with perspective.
Common Composition Mistakes
- Flying Too High: While high-altitude shots can be impressive, they often lack detail and intimacy, making images feel flat and uninteresting.
- Ignoring the Rule of Thirds: Centering subjects can result in static, less dynamic compositions.
- Neglecting Foreground and Depth: A lack of layering in your shot can make it appear two-dimensional.
How to Avoid This Mistake
- Experiment with Angles and Heights: Instead of always going for a bird’s-eye view, try flying lower to capture unique perspectives. For instance, shoot at tree-top level to emphasize scale.
- Use the Rule of Thirds: Enable gridlines on your drone’s camera and align key elements—such as a building or horizon—along these lines for a balanced, professional look.
- Add Depth: Incorporate foreground elements like trees, water, or shadows to create a sense of dimension. These layers make the photo more engaging.
- Follow Leading Lines: Use roads, rivers, or natural features to guide the viewer’s eye through the image, creating a more compelling visual story.
Pro Tip
Shooting during golden hour (early morning or late afternoon) enhances natural lighting and shadows, adding warmth and depth to your composition.
5. Neglecting Post-Processing
Even with perfect composition and camera settings, raw drone footage often needs some level of post-processing to truly shine. A common misconception is that editing is only for professionals, but neglecting this step can result in photos that look flat or underwhelming.
Common Post-Processing Mistakes
- Skipping Editing Entirely: Straight-from-the-drone images often lack contrast, vibrancy, or sharpness.
- Over-Editing: Heavy-handed edits—like over-saturating colors or adding unrealistic filters—can make photos look unnatural and unappealing.
- Not Cropping or Straightening: Slight horizon tilts or excess space can distract from the subject of the image.
How to Avoid This Mistake
- Choose Beginner-Friendly Tools: Use programs like Adobe Lightroom or Photoshop, or free options like GIMP and Snapseed, to enhance your photos.
- Focus on Subtle Adjustments: Start by tweaking brightness, contrast, and saturation. Avoid extreme edits that detract from the natural beauty of your image.
- Correct the Horizon: Always check and straighten the horizon in your photos to ensure a professional appearance.
- Enhance Details: Use sharpening tools to bring out fine details, especially in landscapes or architectural shots.
Bonus Tips
- For video footage, use software like Premiere Pro or Final Cut Pro to color grade and stabilize your shots.
- Save presets for your favorite edits to streamline the process for future sessions.
By incorporating post-processing into your workflow, you’ll transform good shots into exceptional ones. Editing not only corrects minor flaws but also helps highlight the unique elements that make drone photography so captivating.
With these additional tips, you’ll have all the tools to avoid common mistakes and elevate your drone photography to a professional level. Whether it’s perfecting your composition or refining your shots in post-production, every step contributes to creating breathtaking aerial imagery.
Conclusion
Drone photography offers incredible opportunities to capture stunning perspectives, but even the best equipment can’t compensate for avoidable mistakes. By addressing the most common pitfalls—such as neglecting regulations, skipping pre-flight planning, using incorrect camera settings, overlooking composition, and neglecting post-processing—you can take your aerial photography to the next level.
Remember to prepare thoroughly, experiment with creative angles, fine-tune your camera settings, and enhance your photos through thoughtful editing. Each step contributes to creating professional-quality images that stand out.
Now it’s your turn! Apply these tips on your next drone photography adventure and see the difference they make. Have your own drone photography mistakes or lessons to share? Drop your insights in the comments below and let’s learn together. Don’t forget to share this guide with fellow drone enthusiasts looking to improve their skills!